Posted by William Heinselman on
 Replacing or cleaning a plumbing trap is one of the easier plumbing jobs you can do on your own to fix clogs and material buildup in your home or business’s drain pipes. Knowing beforehand how these fixtures operate, as well as the necessary tools and techniques used to clean and restore them, can significantly streamline the restoration process and more precisely deliver your desired results.
First, we will introduce you to the physics and fundamental laws that make plumbing traps work, and then teach you how to clean and replace these traps effectively and easily.
What They Are and How They Work
Modern plumbing traps serve the same general function as their traditional counterparts, but the model sizes, shapes and materials have optimally changed. Plumbing traps, located below sinks, toilets and bathtubs (basically any fixture with plumbing and water access), are essentially just air filtering devices.
Most frequently modeled in a U-, S-, or J-shape, these traps create barriers between the air in your home or business and the sewer gases that naturally exist in plumbing pipes. Trapped water in pipe curvatures create this gravity barrier, as undesirable (and even unhealthy) sewer gasses cannot pass through water seals.
The most common plumbing trap model in homes today is the P-trap, which operates like the U-trap introduced in 1880. The P-trap improves on this classic model by adding another 90-degree joint to the trap, which keeps both unwanted sewer gasses out of the drain section (and your home), and also allows water waste to flow freely through the overflow pipe. This technique is achieved by making the trap’s water seal follow along the trap’s curves.
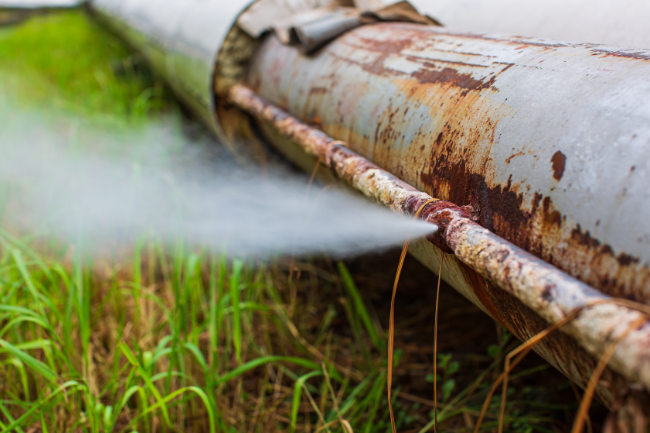
However, because all traps are low-points in plumbing systems, they can easily gather unwanted material and buildup from hair, food products and other debris. Fortunately, there are typically cleanout features and hatches added with plumbing traps, or other means of disassembling and cleaning traps. Not all plumbing traps will have these cleaning cavities, and full detachment may be required to clean out clogs and material residue.
Removing and Cleaning Your Plumbing Trap
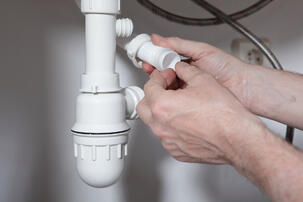
If your plumbing trap requires a full removal for clog cleaning, recovering dropped jewelry and other items, or adding new pipe, there are some drain cleaning tools you’ll need to gather beforehand. For a basic removal and cleaning operation, you’ll want to find: a bucket (for loose water, clogged materials and debris), a wire brush (to actually clean the plumbing trap) and a pair of pliers or adjustable wrench (to physically remove the rap).
If you do not have these items present, they can be picked up at your local home goods or hardware store. If you plan on replacing a plumbing trap, it is also important that you measure the dimensions and materials used in your existing trap.
The following are some plumbing tips to get your plumbing trap cleaning and restoration underway. If you are unable or uncomfortable with replacing or cleaning a plumbing trap by yourself, or feel you may require additional assistance, Sacramento’s trusted specialists Express Sewer & Drain will gladly provide any services required.
Steps:
1.) The first step in removing your plumbing trap is a clear one: shut or seal off water flow through the trap. It is especially important to do this immediately if valuables such as jewelry have fallen into your drain, to prevent damage, corrosion or loss. Remember that water will still be present in your plumbing trap, as that is what creates the seal against sewer gasses. Due to the presence of water, clogging substances and material debris, it should come as no surprise that a catching bucket should be placed underneath the plumbing trap before you remove it for cleaning.
2.) Now that everything is set up for you to remove the plumbing trap, use a wrench or pliers to loosen the nuts holding the trap in place, or unfasten any securing locks attaching the trap to your drain and sewer line. As the trap is loosened, water and debris will begin to flow out of the pipe and into the catching bucket you have placed.
3.) When the trap is fully disconnected, pour out any extra water and loose material in the trap into your catching bucket. Any valuables or other items lost in your drain should come loose when you empty the trap’s contents. Then, thoroughly clean out the plumbing trap using a wire brush. A wire brush should be able to push out and loosen any additional clogged material, as well as remove any additional residue or buildup within the trap. Clear out and remove substances on the trap’s walls to achieve the smoothest water flow upon reattachment.
4.) After cleaning, simply reattach the plumbing trap (or install your replacement, if that was the purpose of the removal) by reattaching the nuts, clasps and pipe seals that integrate the trap with the pipe system. Tighten all screws or nuts by hand, and then finish with the wrench or pliers used to remove the trap. Finish by testing the pipe; run water through your drain and watch for any leaks that may occur from improper installation. Running water through the trap will also recreate the water barrier essential for keeping sewer gasses out of your home.
5.) As a preventative measure, many plumbing experts suggest cleaning your drain and plumbing traps at least four times per year. Families with homes of six or more are strongly encouraged to clean their plumbing traps monthly to avoid clogging and limit residue buildup.
By following this simple process, any clogs, buildups or other problems associated with your plumbing trap should be resolved. However, if problems persist, or a plumbing trap in your home continues to present clogging or performance problems, more extensive renovation efforts may be required.
We encourage you to contact the professional plumbing and water pipe experts at Express Sewer & Drain for further consultation. Our contractors, with real-world experience and water system expertise, can help you resolve any plumbing issues that persist in your water pipes.
Topics: Sewers, DIY, Drain Cleaning and Repair