Posted by William Heinselman on

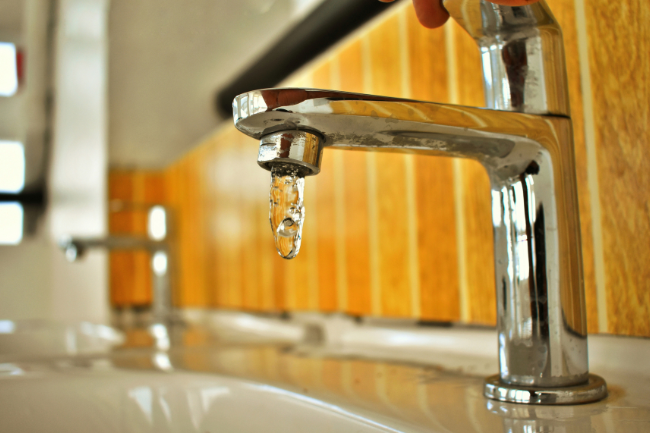
There are many reasons why you may want to replace the old faucet in your kitchen sink. Whether your old faucet leaks, is rusted or is just plain ugly, you want to get rid of it and put in a shiny new faucet.
Reasons You May Need a New Faucet
Your kitchen faucet is one of the most frequently used fixtures in your home, so wear and tear over time is inevitable. Whether you’re dealing with practical issues or looking to enhance your kitchen’s style, replacing your faucet might be a smart move. Here are some common reasons homeowners choose to upgrade their kitchen faucet:
- Leaking or Dripping Issues: Persistent leaks not only waste water but can also lead to higher utility bills and potential water damage.
- Outdated Style: A new faucet can instantly refresh the look of your kitchen, especially if your current one feels dated or mismatched with other fixtures.
- Low Water Pressure: Over time, mineral deposits and internal damage can reduce water flow, making everyday tasks more challenging.
- Desire for Advanced Features: Modern faucets come with innovative features like touchless controls, pull-down sprayers, and water filtration systems for added convenience.
- Rust or Corrosion: Visible signs of rust or corrosion can compromise the faucet's functionality and diminish your kitchen's overall appeal.
Updating your kitchen faucet is not just about aesthetics—it’s about functionality and improving your daily experience in one of the busiest spaces in your home.
Getting Started
Get the Right Supplies
Before you can begin the process of replacing your old faucet, you should make sure that you have the following tools on hand:
- Adjustable Wrench
- Basin Wrench
- Putty Knife
- Plumber's Putty
- Oil/Lubricant such as WD-40
- Bucket
- Rags (for cleanup)
You will also need to determine what type of faucet you currently have in your home, and what type of faucet you wish to use to replace it. Different styles of faucets might be secured in different ways, and may have unique steps in their installation process. You should also check the condition of the hot and cold water lines leading to the faucet. If they're old or corroded, it may be worthwhile to replace these as well since you are already going to be working on the faucet.
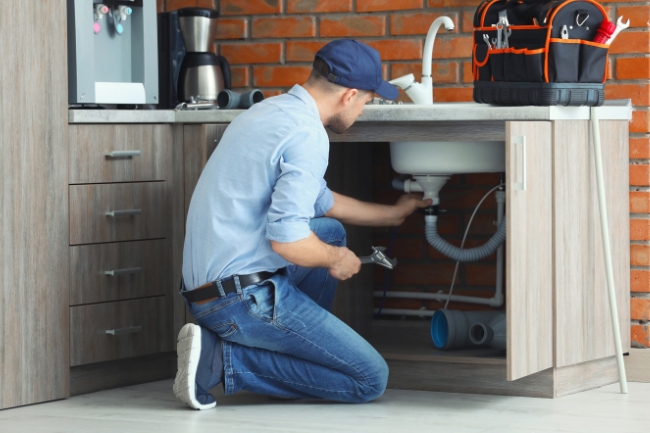
Now that you know you want to remove the old faucet and put in a new one, it's time to get started on your DIY plumbing project.
7 Steps for Removing and Replacing Your Old Kitchen Faucet
Step One: Clean up Your Kitchen
The first step to replace your kitchen sink after you've made sure that you have all the tools you will need to get the job done is to prepare your work area before you begin. This means clearing the clutter from the kitchen counters next to your sink, and removing everything from the cabinet underneath your sink. If you have dishes in the sink, they should be removed prior to beginning work on replacing the faucet.
By removing stray clutter from the countertops, sink, and cabinet underneath the sink, you make it easier for yourself to move around without things falling onto you while you work.
Step Two: Shut Off the Water
There are two ways to accomplish this: you can turn off the water at the shut-offs located under the sink, or you can turn off the main to your home. The first option is more convenient for other members of your household who may be using other water fixtures throughout the home, the second option is better for guaranteeing that there is no water flowing through the system at all while you work. You may even want to turn off your water heater, just to be safe.
Step Three: Disconnect the Water Lines
Using your handy little Basin Wrench, loosen the fittings on both your hot and cold water supply lines where they connect to your faucet. Make sure that you have your bucket and rags on hand to handle the excess water from the line. If you are replacing these lines, go ahead and disconnect them from the wall as well.
Step Four: Remove the Faucet
Use penetrating oil (WD-40) on the faucet's mounting nuts to remove any stuck-on grease or chemical buildup. It may take a few minutes for the oil to penetrate, so give it a while. Once the penetrating oil has had a chance to work through whatever rust or gunk may be on your faucet's mounting nuts, use your basin or adjustable wrench to loosen the nuts with a firm, counter-clockwise twist (remember the old "lefty-loosey, righty-tighty" tip).
After loosening the nuts with a couple of turns, you can probably finish removing them with your hands. So long as the nuts have not been completely rusted to the faucet, they should come off fairly easily.
If your kitchen faucet, like many others, has a separate sprayer attachment, be sure to disconnect it as well before attempting to remove the faucet.
Try to lift the old faucet straight up and out of its old mounting. If the faucet sticks, carefully use your putty knife to work it loose, but be careful so as not damage your sink. Once the old faucet is gone, remove any of the old faucet's caulking or putty from the sink. This is usually accomplished with your putty knife and a rag.
Step Five: Attach the New Faucet
Chances are your new faucet will have specific instructions for its installation, but the following general steps are usually required. If you do have specific instructions for your new faucet, follow those whenever possible.
Your new faucet will most likely require you to install a part called an escutcheon, and no, it's not a medieval shield, it's a cover that goes over the three plumbing holes on the top of your sink. This part serves as a buffer between your sink and the faucet.
To attach the escutcheon (or cover, if you prefer), place the plumber's putty in the groove on the underside of the escutcheon, which should have a groove to help you determine how to place the putty. Once this is done, align the holes on the cover to the three holes that are on your sink, and press the cover firmly into place.
After the cover is in place, slip the end of your faucet through the appropriate hole in the cover. You may also have to attach a spray hose or other attachments if they are a part of your new faucet. Clean up any excess putty from the cover with a plastic putty knife.
Step Six: Connect the Water Supply
Now is the time to go back under the sink to finish the job. First, make sure the mounting nuts are secure, but not over-tightened. You may have to re-adjust the faucet to get the facing right, so leaving yourself a little slack is a good idea.
Connect your new or existing water supply lines back to your faucet, making sure the connections are solid. Tighten the connections using either an adjustable wrench or a basin wrench.
Once again, your new faucet will have specific instructions for how to do this.
Step Seven: Complete and Check Installation
After you have connected your water lines to the new faucet, check the installation. Make sure that all faucet fixtures are facing the correct direction, and that everything looks right.
Now, place a bucket underneath the water supply lines in your cabinet, and turn the water back on. It may take a few moments for your pipes to achieve optimum pressure if you cut off the main water supply, so be patient. Turn on your faucet, and check to see if the water supply is leaking.
If both the hot and cold water supply lines are working correctly, congratulations! You have just finished the installation of your new faucet.
Replace Your Kitchen Sink With the Help of Express Sewer
If the reason you wanted to replace your sink is that you have noticed that there is debris in your water, the problem may not actually be your faucet. If the debris continues to show up in your water after replacing your faucet, it may be time to replace some of the water pipes in your home.
For further help with your everyday plumbing needs, or if you want to find out what's causing your drinking water to come out discolored or full of debris, don't wait until it's too late to contact your Sacramento Sewer & Drain experts for help. Contaminated water is no small problem, and fixing your supply is a critical part of keeping your family healthy.

Topics: Pipe Leaks and Repair, Home Plumbing, Drain Cleaning and Repair