Posted by William Heinselman on
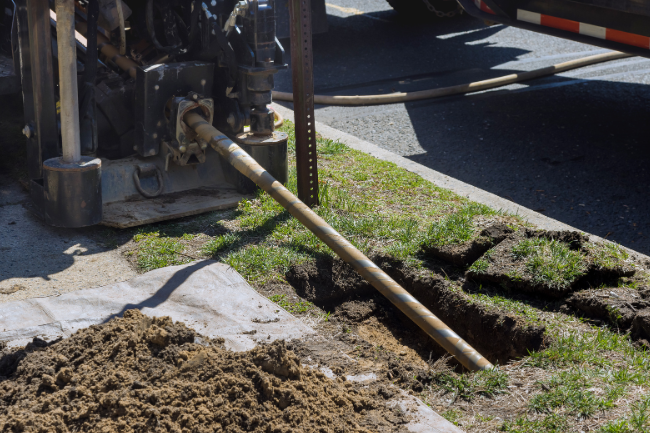
Lateral pipe lining is a trenchless technology method used to rehabilitate the main sewer pipe coming from your house and connecting to the city sewer. It uses the same cured-in-place pipe technology that cities and municipalities have been using for decades to fix their main sewer pipes with out having to dig them up. This technology has been leveraged in the smaller pipe market for the last 15 years by companies like Express Sewer and Drain to fix smaller pipes (2" - 6" in diameter) for residential customers. This means we can fix your old sewer and create a new "pipe-within-a-pipe", with little or no digging, and that will last for the next 50 years.
So now we know what is possible with lateral pipe lining. The question then is, what can go wrong and how do we make sure your lateral pipe lining job goes smoothly. There a four main things to consider and execute properly for a lining job to go well.

4 Key Steps To A Lateral Pipe Lining Job
1. Evaluate The Pipe: Is It A Good Candidate For Lining?
This step is crucial for a successful pipe lining project. The lateral sewer pipe has to be a good candidate for lining. What does this mean? Not all sewer pipes are a good fit for lining, for example if the pipe has the following issues it is not a good fit for lining
- Belly in the pipe with more than 1/2 pipe full of standing water
- Offset joints of more than 20%
- Short, hard 90 degree bends (although these can be done it can be difficult)
- Collapsed pipe
While lateral pipe lining is a less intrusive and more cost effective method of fixing your sewer, it cannot overcome every obstacle. It is important that your pipe lining company is honest with you about whether or not your sewer pipe is a good candidate for lining or not.
2. Clean The Pipe Thoroughly
This is important prep work that goes into the job. You must get all of the grease, dirt, roots, and pipe scale build-up out of the pipe before you can line it. This can be quite tricky, especially it your sewer pipe is in bad shape (let's face it, if it was in good shape your wouldn't be fixing it right?). One method that is commonly used for this is hydro-jetting the sewer pipe. This method of cleaning uses high pressure water to scour the inside of the pipe, removing all of the debris, grease, cutting the roots out, etc. If there is heavy cast iron scale build-up in your sewer pipe, you can put a cutter head on the jetter that will remove all of this metal (rust) build-up. Once the pipe is thoroughly cleaned it's time to move to the next step.
3. Video Inspection And Measurement
Once the drain pipe has been cleaned properly it's time to inspect the pipe with a sewer video inspection camera. This will allow the lining crew to make sure that the pipe was successfully cleaned and there are no obstructions in the line. They will also use this camera to get the right measurement for the pipe liner.
Correctly measuring the liner is absolutely critical for your lateral pipe lining job to be successful. Measure twice and cut once is the motto here! An experienced lining crew will take things like, stretch, turns and desired stopping points in to consideration while measuring the liner.
4. Hold Consistent Air Pressure And Allow To Fully Cure
Lateral Lining uses air pressure to invert (turn the liner inside out as it goes through the pipe) and hold in place while the epoxy resin is curing. Once cured it creates a new pipe inside of your old pipe. It is imperative that you hold enough air pressure on the liner and calibration tube (balloon that stays inflated throughout the curing process) during the entire lining process. If for instance you have a lot of ground water that is coming into your pipe because you have cracks in it, and you lose pressure on the liner half way through the curing process, that water will get in between the pipe and the liner and create an bubble that will obstruct the flow.
You also want to make sure that the liner is fully cured before you deflate the calibration tube (balloon) and put the newly rehabilitated pipe back into use. If you pull the calibration tube too early the liner will collapse and harden in this position. It typically take 2-3 hours for a lateral pipe liner to cure (faster if you use steam or heat to expedite the process).
There you have it. Follow these 4 simple steps to a successful lateral pipe lining job and give new life to your old sewer pipes. If you are a homewoner or contractor and would like more information about pipe lining and what Express Sewer and Drain can do for you, contact us for a Free Sewer Evaluation.
Topics: Trenchless Technology
![Repiping Your Sacramento Home [6 Steps]](https://www.expresssewer.com/hs-fs/hubfs/plumbing%20tools%20and%20blueprints.jpeg?width=550)