Posted by William Heinselman on
 As more and more American homeowners make the switch from conventional water heaters to high efficiency tankless models, many opt to replace their heaters on their own, as opposed to contacting a professional plumbing service provider. While it’s certainly possible to install a tankless water heater on your own, you should only do so if you’re absolutely certain you can take on the challenge, and have the right tools and know-how for the job.
Tankless water heaters can help you save dramatically on everyday water and energy consumption, it’s no wonder that, when traditional units start to show signs of age, many make the upgrade. In this blog post, we detail how you can, with the right preparation, install a tankless heater entirely on your own.
Note: this blog details how to install whole house tankless water heaters, as opposed to point of use heaters, which can be installed relatively easily near the fixture they are heating water for.
Step 1: Preparation and Safety Precaution
Installing a tankless water heater on your own is one of the most difficult DIY plumbing projects we’ve discussed in our blog. Tankless heaters typically require a larger supply of power and wider exhaust system, and you may end up with more work than you initially bargained for in your efforts. Additionally, a common gas supply line material, corrugated stainless steel tubing (CSST), can become damaged or ruptured in some environmental situations, throwing added complication into your project.
Read through the rest of this guide to determine if you’re up to the task, and if not, don’t hesitate to have a professional plumber handle the installation for you. It’s better to be safe than sorry.
Moving on to the materials you’ll need for the job. When it comes to installing a tankless heater, most of the the tools and fixtures you need will come packaged with the unit:
Your new tankless heater, plus the hardware and instructions that come packaged with it
- A screwdriver
- CSST supply line
- Gas line connector
- New water lines (as needed)
- Hanger brackets for the water lines
- Heat-resistant sealant
- A bucket
During the preparatory stage, you should also read up on building codes in your state and city to ensure you have the clearance to install a tankless water heater, as well as CSST pipe, in your property.
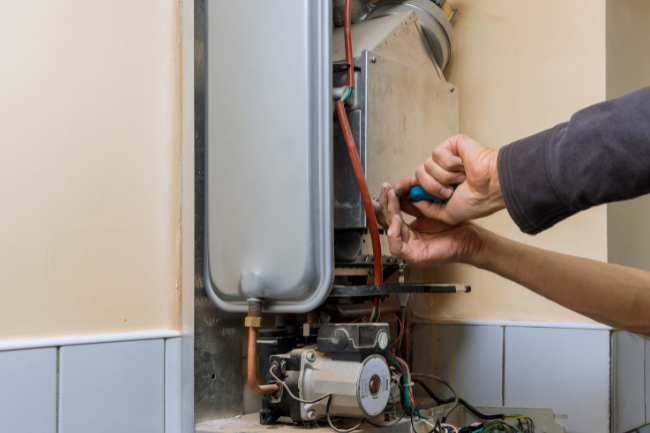
Step 2: Removing the Old Heater Unit
It should come as no surprise that the first big step in installing a tankless water heater is removing your old, traditional heater unit. Start by turning off the water supply to your home and disconnecting the old unit from the water supply line. As there may be some water left in the supply line, this is where having a bucket on-deck can help.
Next, you’ve got to disconnect the unit from its heat source. For electric heaters, all you’ll have to do is unplug the heater from its outlet. For gas heaters, shut off the gas supply valve before moving forward. Once you’ve completely freed your traditional water heater from all power and supply lines, get rid of it in accordance with local laws.
In Sacramento (and all of California), simply trashing old water heaters is prohibited, as they typically contain pilot light sensors - which contain mercury. Instead, you must contact a recycling and waste management agency in your area to dispose of your old water heater. A list of Californian hazardous waste agencies can be found here.
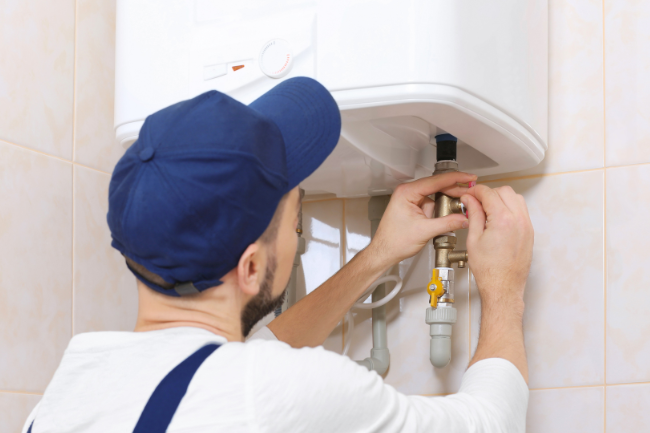
Step 3: Mounting to the Wall and Connecting Utilities
To actually mount the new heater unit to your wall, carefully follow manufacturers instructions and use the hardware provided. Make sure that the unit is properly supported and fastened to your wall.
Connect the water line to your mounted unit (or install a new one, if necessary), and use hanger brackets to hold the pipe in place and prevent it from touching walls and other surfaces. Solder pipe joints as needed.
The following instructions are for gas-powered tankless water heaters. With the water line connected, install a gas line connector to your existing line, and run a CSST supply line through the other end. Make sure the gas line is still shut off, and connect the CSST line to your tankless heater.
Tighten all nuts and gas line connections, and turn on the gas. At this stage, you may want to use a gas sniffer to check for gas leaks or loose fittings. If there are no such leaks, you can turn on the gas and pilot light as per manufacturers instructions and test your unit. It may take time to initially heat up water on first use.
For electrically-powered tankless heaters, all you have to do once the water line is connected is plug into a power supply. From here, you can check your unit and enjoy hot water at much higher efficiency - and lower cost - than you would with a traditional heater.
Topics: Water Heaters, DIY