Posted by William Heinselman on

Tackling minor kitchen pipe issues yourself can save you time and money, but it’s important to approach the task with the right knowledge and tools. Whether it’s a leaky joint, a clogged drain, or a dripping pipe, many common problems can be resolved with simple DIY solutions.
In this guide, we’ll walk you through the signs it’s time for a repair, common mistakes to avoid, and easy steps to get your kitchen plumbing back in working order. Let’s dive into the basics of DIY kitchen pipe repair and empower you to handle these fixes like a pro!
When is it Time to Repair Your Kitchen Pipes?
When it comes to kitchen pipe issues, minor problems can often be addressed with a bit of DIY know-how. However, knowing when to repair your pipes is crucial to avoid larger, more expensive plumbing disasters. If you notice any of the following, it's time to consider taking action:
- Leaky or dripping pipes: Persistent leaks can waste water and lead to higher utility bills.
- Low water pressure: This might indicate blockages or corrosion inside the pipes.
- Unusual odors: Foul smells can suggest a broken or clogged pipe allowing sewer gases to escape.
- Visible rust or discoloration: Signs of aging pipes that may fail soon.
- Unexplained water stains: Water damage under the sink or on walls near pipes often points to hidden leaks.
Addressing these issues early can save time, money, and prevent further damage.
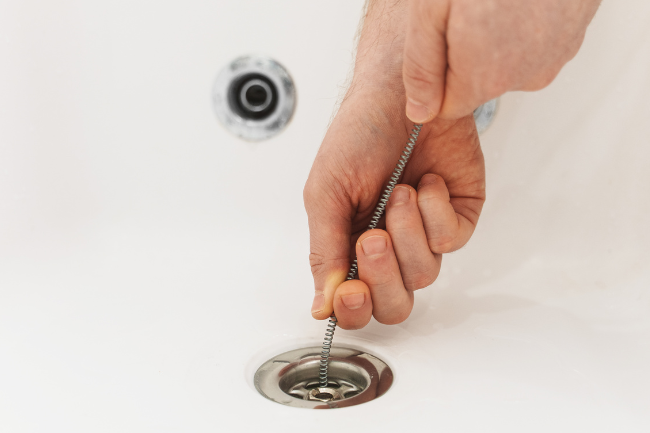
Simple Pipe Repair in 4 Steps

Follow these easy steps for your DIY pipe repair.
1. Prep
Before you begin your pipe repair, clear out the items below the sink to give yourself more room. Then turn off the water to the kitchen sink, or the entire house if there’s no turn-off valve. Next, place a bucket under the pipes. This will catch water that’s already in the pipes as you complete your pipe repair.
2. Disassemble Pipe
To begin your pipe repair, loosen the slip nut of the leaking pipe. You can do this by hand for plastic pipes. For metal pipes, use a pipe wrench.
3. Replace Parts
The next phase of your pipe repair is to replace the old parts. Place the new slip nut onto the pipe. Make sure the threads of the nut are facing the threading on the pipe that you want to connect it to.4. Test
Now that you’ve successfully replaced the necessary parts and carefully reassembled your pipe, it's time to thoroughly check your pipe repair to ensure everything is functioning correctly. Begin by turning the water supply back on, either at the kitchen sink or the main valve if you had to shut off the entire house's water.
Once the water is flowing, run the faucet for a few minutes to allow water to pass through the newly repaired section of the pipe. As the water runs, closely inspect the area around the repaired joint for any signs of leakage. Look for drips, moisture, or any unusual sounds that might indicate a problem. If the pipe remains dry and there are no leaks, congratulations! Your repair is successful. However, if you notice any leaks, you may need to tighten the connections further or reassess the installation of the washer and slip nut.
Common Mistakes to Avoid When Repairing Your Kitchen Pipes
Repairing kitchen pipes can seem straightforward, but many DIYers make mistakes that lead to bigger problems down the line. Avoiding these pitfalls is key to ensuring a successful repair. Here are some common mistakes and how to steer clear of them:
- Using the wrong tools or materials: Improper tools or mismatched pipe fittings can worsen the issue. Always double-check compatibility before starting.
- Overtightening connections: Excessive force can crack fittings or strip threads. Tighten connections snugly but not excessively.
- Skipping the water shutoff step: Failing to turn off the water supply can lead to unexpected flooding. Always shut off water valves before repairs.
- Neglecting to clean or dry surfaces: Dirt and moisture can interfere with proper sealing. Clean and dry all areas thoroughly before applying sealants or connecting pipes.
- Ignoring proper measurements: Misjudging pipe lengths or fitting sizes can result in leaks or a poorly assembled system. Measure twice to ensure accuracy.
By taking these precautions, you can prevent common errors and tackle kitchen pipe repairs with confidence.
Call For More Help With Pipe Repair
That’s it! You’ve completed a simple pipe repair at home. If the pipe continues to leak or you have another plumbing need, call the experts at Express Sewer & Drain. We’ll be glad to answer any questions you have about pipe repair or other household plumbing problems.

Topics: Home Plumbing, DIY