Posted by William Heinselman on
 If you've got a broken lateral, then you've got a double problem: you not only have a pipe that's leaking, but you've got a pipe that's leaking black water and sewer materials. That's a big problem, as health risks and other problems are much worse when it's unsanitary water that's leaking. If you're planning on rehabilitating your laterals, the easiest way is to rehabilitate the pipes using lining techniques.
However, we know that you're a discerning customer. You'd probably like to know the other options in rehabilitating or replacing a leaky lateral line, and we've got those answers. You might not like them much, but they really are the only other alternative.
Alternatives To Lateral Lining
If the lateral is leaking and you don't want to line it, then replacing that lateral line is the only way you'll succeed at what you're doing. If you don't, you'll keep your problem forever. What's all involved in replacement, you ask? Well, it's a complex procedure that involves a lot of work and a lot of time wasted.
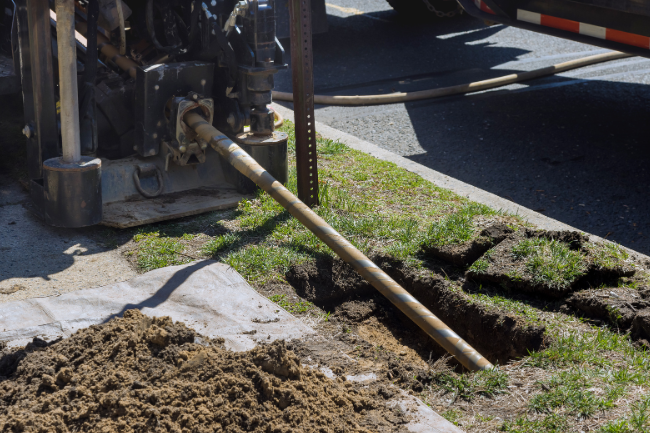
For instance, to replace a lateral line (which is usually buried underground), you'll need to excavate the ground to get access to the pipe. This often means bringing in an excavator to remove all of the soil above the lateral line.
After that, there's usually a layer of fabric that keeps the topsoil out of the rock layer. It's there for a very good reason: the topsoil shouldn't get into the layer of rock because it affects the pipe's function. When you're removing the fabric layer, make sure that the top soil doesn't get into the rock layer. Also note: you shouldn't reuse that fabric. Dispose of it properly.
Find where the supply pipes attach to the municipal laterals, and be ready—you're going to have to saw the pipe off with a PVC saw or a hacksaw (depending on what the pipe's made out of). Take down the elevation of the lateral after you cut it but before you remove it—you'll need it when you put the new pipe in.
You'll remove the pipe from the ground at this point. Make sure that you safely dispose of this pipe, as well—sewage has traveled through it, after all, and it's just as much a public health hazard as the leak was.
After this, you'll have to shovel the rock bed to ensure that the trench in the rock bed is the same depth as it was when you had the original lateral in the ground. This is important as a different elevation will affect how your lateral works, possibly rendering it useless (meaning yet another replacement). Be sure you've got a level, correct-elevation lateral in the ground before you continue.
You'll need to prime and place the replacement lateral at this point, which allows it to stay firmly in place and continue providing service. After this, you'll have to put the rock bed back, put down a new sheet of the fabric, and cover the spot again with topsoil. That will complete the replacement, albeit with a ton of work and an unsightly patch of soil from the excavation.
Replacement Is A Poor Alternative
All of that work for nothing, really. Replacement of the lateral isn't as simple or as non-invasive as a good lateral lining job. We can place a liner in place and fix the break without creating too many problems for your home. That's the great part! If you're interested or have any other questions, give us a ring and we'll be happy to answer your questions. Don't let that lateral go—call us!

Topics: Trenchless Technology
![Repiping Your Sacramento Home [6 Steps]](https://www.expresssewer.com/hs-fs/hubfs/plumbing%20tools%20and%20blueprints.jpeg?width=550)