Posted by William Heinselman on
 There are many reasons why you may want to replace your existing water main. You could find debris in your drinking water, have weak flow to your water faucets in the home, a skyrocketing water utility bill, or you could even notice large puddles of standing water in your yard between your water meter and your home. Any of these problems can be evidence of a problem with your water main such as rust in the pipe or a leak in the line.
Whatever the case may be, you have decided to replace your old pipes and replace them with new pipes. Now, you just have to get started. To start the process, you'll need to have the appropriate tools before you begin, including:
- Tape measure, for measuring how much pipe you will need.
- A spade, a long, narrow-headed shovel ideal for digging trenches.
- Sand, the amount will vary based on how long your water main is.
You can hold off actually buying the replacement pipe until after you determine how much pipe you will need, what material it will be made of, and what size you should be using for your home. To aid in selecting the right pipe material, you may wish to consult the California Plumbing Code in order to make sure you do not install a pipe material that is illegal for water main use in our state.
Now that you have your basic excavation and measurement tools, you are ready for the first step in replacing your busted, rusted old water main:
Step One: Finding the Location of Your Main, and all of Your Other Utilities
Before you start digging holes into your yard, it is important to know where your water main runs. Equally important is knowing where your other utilities run, such as your sewage line, gas main (if you have one), and your electrical lines. More than one do-it-yourselfer has recklessly started digging a trench, only to accidentally cut the power to their house, while also risking electrocution in the process.
Before you begin to dig up your trench, contact your utility provider and have them mark off the locations of the utilities in your yard so that you know where not to dig if you do not absolutely need to. It is worth waiting for such a service before you start, since it helps you avoid having to deal with the hassle of losing power or accidentally hitting the wrong line.
Once you know the locations of all of your utilities, you are now ready to:
Begin Digging
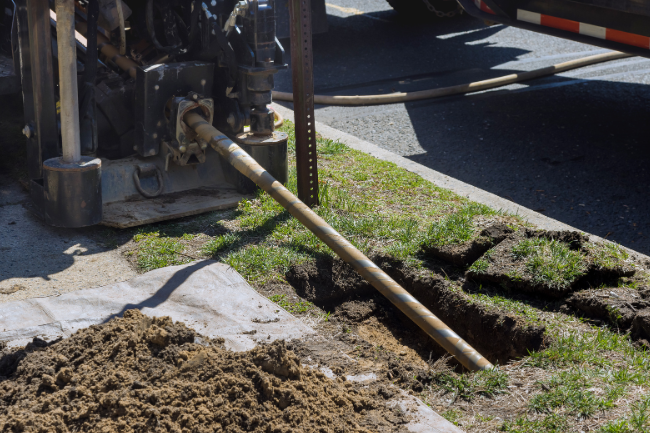
Find the start and end points of your water main, and dig them up to expose the pipe at both ends. Then, start digging along the length of the pipe, using caution around areas that cross with other utilities (they should not overlap, but it has been known to happen, if your utilities are too close together, you may have to re-route them to meet the current California plumbing code). Just keep following the length of your water main until you have excavated the entire pipe, and have a ready-made trench for the new pipe. If your pipe runs underneath concrete, you may need to bust that concrete open too (you will need a permit if the concrete is city-owned).
Determine How Much Pipe You'll Need
Measure your existing pipe. This should give you a good measurement of how much pipe you will need to replace your old line. Hopefully, you will not need to re-route your new pipe to avoid conflicting with your other utility lines. If you do have to re-route your new pipe, measure out the length of the detour carefully. It may be a good idea to purchase an extra length of pipe or two, just in case. You should also buy enough sand to line the bottom of your trench roughly an inch deep to protect your new pipe from sharp objects.
Also, be sure to check the diameter of the old pipe, as it can give you insight into how big the new line's pipe should be. If you are unsure what size pipe to use for your home, consult with an expert at your supply store when you are shopping for new pipe. Be sure to use materials that are compliant with the California Plumbing Code to avoid problems in the future.
Once you have the replacement pipe, you are ready to:
Remove the Old Pipe
Start by shutting off the water supply to your home. This should be easily accomplished using your home's emergency shut-off valve. After turning off the water, disconnect the old pipe at both ends, and dismantle it piece by piece. If your existing pipe was made from galvanized metal, you may actually be able to turn it in to your local recycling center to help cover the costs of replacing it. Otherwise, set aside the old pipe for proper disposal.
During the removal of the old pipe, you may notice that a small amount of water is spilling from it. Do not worry, as a little water will have stayed in the line after you shut off the line's supply, so this is normal.
Install the New Pipe
After you remove the old pipe, line your trench with sand to about one inch deep. This will help prevent sharp rocks or soil intrusion from damaging the new line you are about to install.
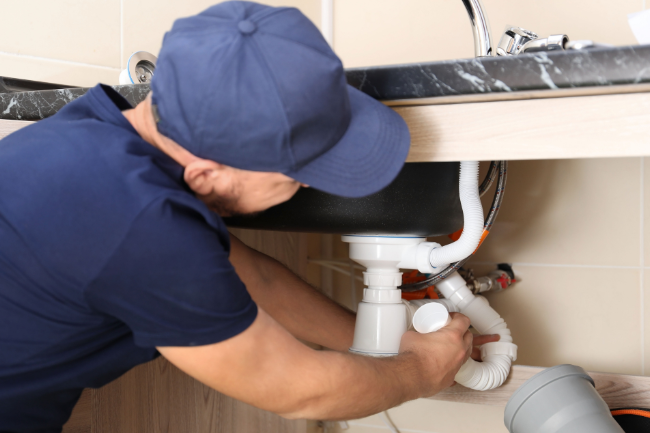
Now you can install the new line along the bottom of your trench. The specifics of this step will vary a bit depending on the type of pipe you are installing. For example, if you are installing copper pipe, this step could involve the use of a blowtorch, while Polyvinyl Carbonate (PVC) pipe may need sealant and curing. If you are unsure of how to install your pipe, please seek assistance from a knowledgeable professional for help.
Once you have connected your new pipe, and made sure that it is properly sealed, test the line by turning the water back on and running cold water through your home's fixtures for a few minutes. This will help to flush any remaining debris from the system in addition to revealing if the new line has a leak. Once you've made sure there are no leaks, you are ready to:
Fill in the Trench
You've dug a long, deep hole through your yard, now it's time to fill it. For most stretches of your yard, this should be as easy as grabbing a transference shovel (the type with a square head) and shoveling the dirt back into the hole it came from. If you had to disturb concrete to dig your trench, then you'll have to shell out cash to repair it.
Given time, you may even be able to fix the damage you had to do to your garden in order to dig out your trench too. Just be prepared for a lot of hard work rehabilitating the parts of the yard that had to be destroyed for this project.
The Alternative
Of course, you no longer have to dig up your yard and destroy your home's greenery in order to replace or repair your existing pipe. Thanks to trenchless plumbing technologies, you can have the old pipe re-lined or replaced without having to go through the labor of tearing up your yard and then having to rebuild it all over again.
If you need more assistance with your DIY plumbing projects, or want to take advantage of our expert trenchless plumbing solutions, don't hesitate to contact Express Sewer & Drain, your trenchless technology experts for your Sacramento plumbing needs.
Topics: Trenchless Technology, Commercial Plumbing, Water Heaters, Home Plumbing
![Repiping Your Sacramento Home [6 Steps]](https://www.expresssewer.com/hs-fs/hubfs/plumbing%20tools%20and%20blueprints.jpeg?width=550)