Posted by William Heinselman on

Are you tired of dealing with a clogged or leaky shower drain? It may seem like a daunting task, but replacing a shower drain can actually be done in just 5 easy steps. Say goodbye to shower drainage issues and hello to a smoothly functioning shower with these simple steps. Let's get started!
When is Shower Drain Replacement Necessary?
Shower drain replacement is necessary when the existing drain becomes damaged or clogged beyond repair. This may occur due to age, corrosion, or improper use of the drain. Damaged drains can lead to leaks, mold growth, and unpleasant odors in your bathroom.
Additionally, if you notice that water is not draining properly or there is standing water in your shower, it may be a sign that a replacement is needed. It is important to address these issues promptly to prevent further damage and to maintain the functionality and cleanliness of your shower. Regular maintenance and inspection of your shower drain can help identify any potential problems before they escalate, ultimately saving you time and money in the long run.
5 Steps for Replacing Your Shower Drain

Gather the Necessary Tools and Materials
Shower drain replacement can be overwhelming, especially for those who are not familiar with plumbing. However, with the right tools and materials, replacing a shower drain can be a manageable project. The necessary tools and materials for shower drain replacement include:
- A screwdriver or pliers
- A pipe wrench
- Plumbers putty
- Silicone sealant
- Plumbers tape (Teflon tape)
- Replacement shower drain kit
- Towels or rags for cleaning up any spills or leaks
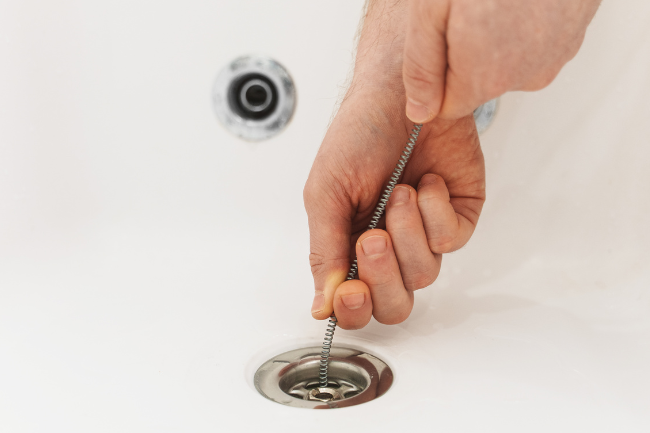
Remove the Old Shower Drain
Follow these steps to successfully remove your shower drain:
- Remove any screws or bolts securing the drain cover to the shower floor.
- Use pliers to twist and pull out the drain cover from the opening.
- Next, use a drain removal tool to loosen and unscrew the drain body from the pipe underneath.
- If you do not have a drain removal tool, you can use pliers to grip the edges of the drain body and twist counterclockwise until it comes loose.
- Once the drain body is removed, you will see any accumulated hair or debris blocking the flow of water. Use gloves or tweezers to remove this buildup.
- Finally, clean around the opening with baking soda and vinegar or a commercial cleaner before installing a new drain.
Following these steps and having some basic tools on hand can allow you to easily remove your shower drain and keep your bathroom clean and functioning properly. Remember to always exercise caution when working with plumbing fixtures and seek professional help if needed.
Prepare the Area for Installation
Once you have successfully removed the old shower drain, it is crucial to properly prepare the area for the new drain installation to ensure a seamless fit and prevent future leaks. Here are the detailed steps to guide you through this process:
- Carefully inspect the drain hole for any signs of damage or corrosion. It's important to assess the condition of the drain pipe thoroughly. If you discover any issues, such as cracks or significant wear, take the necessary steps to repair or replace the drain pipe before proceeding.
- Next, apply a generous bead of high-quality silicone sealant around the perimeter of the drain hole. This creates a watertight seal that prevents water from seeping under the drain and causing damage over time. Ensure that the sealant is evenly distributed, covering the entire edge of the drain hole without gaps.
- Carefully position the rubber gasket or flange of the new drain into the drain hole. It is crucial that the drain is centered and level to facilitate proper drainage and prevent pooling water. Take a moment to adjust the drain as needed to ensure it sits perfectly within the hole.
- Finally, secure the new drain in place by tightening the locking mechanism. This step may vary depending on the specific type of drain you are installing, so refer to the manufacturer's instructions for guidance. Ensure that the drain is firmly secured to avoid any movement, which could compromise the seal and lead to leaks.
These steps can help you confidently install your new shower drain, knowing it has been properly fitted to provide reliable performance and prevent water damage in your bathroom.
Install the New Shower Drain
Now that the area has been properly prepared, it’s time to install the new shower drain. To ensure a seamless and leak-proof installation, follow these detailed steps carefully:
- Carefully insert the drain body into the designated drain hole. Make sure it is perfectly aligned with the rubber gasket or flange. This alignment is crucial for preventing future leaks and ensuring that the drain functions properly.
- Once the drain body is in place, use a wrench to gradually tighten the locking mechanism of the drain. It's important to secure this connection firmly to ensure the drain remains in position and functions efficiently, but be careful not to overtighten as this could damage the components.
- After the drain is securely installed, take a moment to wipe away any excess silicone sealant from the drain and the surrounding area. This not only ensures a clean finish but also prevents any sealant from curing in unwanted areas, which could affect the appearance and functionality of your new shower drain.
By following these steps with attention to detail, you'll ensure that your new shower drain is installed correctly and will function reliably for years to come.
Test the Drain for Leaks
After installing a new shower drain, it is important to test for leaks before using the shower. The first step is to plug the drain with a rubber or plastic stopper. Then, fill the shower base with water until it reaches about one inch in depth. Let the water sit for at least 15 minutes and observe if any water is leaking from the drain. If there are no visible leaks, remove the stopper and let the water drain to ensure there are no hidden leaks.
It is also a good idea to check the area around the drain for any signs of moisture. If everything appears to be dry, then your newly installed shower drain is functioning properly and ready to use. This simple test can save you from potential water damage and ensure a hassle-free shower experience in the future.
Having Trouble With DIY Shower Replacement? Call a Professional
By gathering the right tools, removing the old drain, preparing the area properly, and installing your new drain, you've taken important steps to ensure your shower remains functional and leak-free. Regular maintenance and prompt attention to any future issues will keep your bathroom in top condition.
Remember, while DIY projects like this can be rewarding, never hesitate to call Express Sewer if you encounter challenges beyond your comfort zone. Here's to a smoothly functioning shower that enhances your daily routine!

Topics: Home Plumbing, DIY