Posted by William Heinselman on
Kitchen Islands are beautiful additions to any kitchen. They offer additional storage and cooking space, or they can be used for sinks, stove ranges, dishwashers, or a combination of the three.
Most often, people choose to have kitchen island sinks above the other options. If you are thinking about installing or replacing a sink in your kitchen island, there are some important plumbing matters for you to consider.
While setting up plumbing for your island kitchen sink may require extra preparation, it is possible for most homeowners to do it themselves.
It can also save you a nice bit of money to do it yourself.
Let's walk through these step-by-step instructions to help you overcome island sink plumbing challenges.
Unique Challenges With Island Sink Plumbing
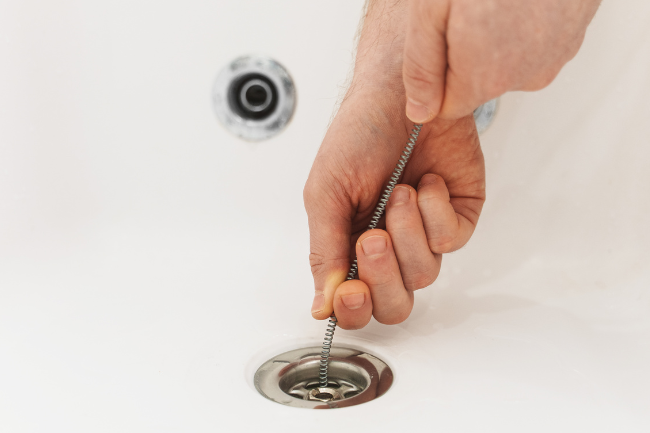
Plumbing and repairing kitchen island sinks is often more challenging than plumbing or repairing standard kitchen sinks. Regular kitchen sinks are installed against a kitchen wall, and they have drain pipes and vents that run directly through the wall. A regular sink has venting that goes upward in the wall, and the drain of water flows downward toward the floor.
In contrast, island sinks require everything to be contained within the island itself, which means that venting that goes upward is not an option.
You'll need to make some adjustments to prevent sewer gases from coming up your sink pipe and bringing unpleasant odors into your kitchen.
Step-by-Step Guide for Island Sink Plumbing

Here is a step-by-step guide that walks you through how to plumb and install an island sink and island sink vent.
1. Make Sure You Are Armed With the Right Plumbing Tools to Install or Replace an Island Sink.
The first step in venting or installing an island sink is making sure you have all the necessary tools to get the job done. Some tools you may need to install or replace an island sink include:
- Horizontal PVC pipes
- Clean-out tee fittings
- An air admittance valve or curved vent pipe
- Hacksaw
- PVC pipe cement
- Sandpaper
- Marker
2. Choose Between a Curved Pipe Vent or Air Admittance Valve.
There are two ways to plumb an island sink so that waste water doesn't clog easily. The first option is a plumbing vent for island sinks. These are typically looped or curved as high as they can get inside the cabinet. The curved pipe vent then heads under the floor and over to the wall that contains the main vent.
The purpose of the curved vent pipe is to continuously provide air to the P-trap (or other style drain trap), which allows water to drain at a consistent speed. This venting technique eliminates the need for outside vents like those used for conventional wall-mounted sinks.
The second option is the air admittance valve or AAV. This valve requires no outside venting, making installation much easier. An AAV is a gravity-operated valve that opens when the flow of water in your pipes generates negative pressure, thereby allowing air to enter the valve to equalize pressure.
A drawback to consider with AAVs is that they often can't keep up with the water pumping demands required for high-volume dishwashers. It is also difficult for them to relieve the pressure in draining and vent systems in buildings over five stories.
An AAV may be the wrong choice for you if you are plumbing an island sink and dishwasher.
Before you choose one option over another, it is essential to get proper approval from a local plumbing inspector. Some local plumbing codes may not accept one option over the other.
3. Start Installing Your Curved Island Sink Vent or Your Air Admittance Valve.
Now that you've chosen the right vent, you can begin installation.
Curved Pipe Vent Installation Instructions
1. Attach a horizontal pipe about 6” or so to the drain pipe, after the sink’s drain trap (the “P” shaped curvature in the sink’s pipe).
2. At the other end of the PVC pipe, attach a clean-out tee fitting vertically. The clean-out tee will make it easy to unclog or snake your pipes should they become plugged. The downward opening will be for your water flow pipe, while the upward tee opening will serve as the air vent opening.
3. Install the water flow pipe as you normally would, and run the pipe beneath the kitchen floor.
4. Attach a vertical pipe to the other end of the tee fitting as high as possible within your island cabinet, leaving enough space for a 180-degree curve. You can use either two 90-degree pipe sections or one 180-degree curve. The key at this stage is to make sure the curve is as high as it can possibly be within your island cabinet.
Air Admittance Valve Installation Instructions
You should install an air admittance valve as physically high as possible within an island cabinet using a vertical clean-out tee fitting.
1. Attach a horizontal pipe to the sink’s drain pipe after the drain trap, and install a clean-out tee at the other end.
2. Run a downward water pipe as you would for a regular sink, and install an upwards pipe to the opposite end of the tee fitting. At the top of the vertical pipe, attach the admittance valve.
3. The gravity-operated valve will open to let air in when water flows through the drain pipe to create negative pressure. This capability eliminates the need for a vent pipe altogether, but you’ll still need to run a standard water pipe under your kitchen floor.
When to Contact a Professional
You should contact a professional plumber for your island sink whenever you encounter persistent drainage issues, leaks, or complex installation needs. If water backs up frequently, drains slowly, or produces foul odors, it may indicate a deeper blockage or venting issue that requires expert attention.
Additionally, if there are visible leaks under the sink or signs of water damage in the cabinetry or flooring, immediate repair is crucial to prevent further structural damage and mold growth. For those planning a new island sink installation or renovation, consulting a plumber is essential to ensure the proper placement of venting solutions like a loop vent or air admittance valve (AAV), which are critical for maintaining proper drainage and preventing sewer gases from entering the home.
When in doubt, a professional can assess the situation, identify potential code violations, and provide a long-term solution to keep the island sink functioning efficiently.
Need Help With Your Island Sink? Contact Express Today
By following these steps, you should have a properly vented and functioning island drain pipe. If you need assistance with your island sink plumbing in the Sacramento area, then contact a local plumbing expert to help you get your island sink and vent up and running.

Topics: Home Plumbing, DIY